How to set-up and use py.test in Pycharm
In this article, we’ll take a look and set-up pytest framework in PyCharm using our small example project. We’ll also introduce and try two very useful pytest-plugins to run tests more flexibly and effectively to save our time and CI/CD resources.
MasterMind – example project
For the sake of this article, we’ve prepared a small project called MasterMind. It’s a simple console-based game where the computer generates a random number that you have to guess.
You can download the project from here.
Development environment
Brief description of MasterMind’s project structure.
/mastermind <--------------  top-level dir
  /src <-------------------  source codes / modules
    /mastermind <----------  main python module
      __init__.py
      __main__.py <--------  entry point (startup of game)
      exceptions.py <------  contains game exceptions
      game.py <------------  game logic
      heading.txt <--------  heading at the beginning of the game
      utils.py <-----------  various helpers
  /tests <-----------------  pytests
    test_mastermind.py <---  test suite
  setup.py <---------------  package setup script
Please notice that we’re using src folder to separate top-level Python modules from the main directory. This is used to protect from accidental imports and other unwanted effects. If you’re interested in more details, check out this blog.
I’m bringing this up because we’ll have to do some additional steps in PyCharm configuration.
Pycharm Configuration
So here we are, firing up PyCharm and opening the mastermind folder as a new project.
If you’re following this tutorial, you can extract mastermind.zip and open the mastermind
directory in PyCharm. This will become the root folder of our project in PyCharm.
Next we’ll need to configure PyCharm, to use Python3 as our project’s interpreter. You can find this setting under Preferences -> Python interpreter. If there are no interpreters at all, we’ll have to add one. This will also create a virtual environment.
Since we are using a clean virtual environment, we also need to install the pytest framework
in order to use it for running our tests. Just stay on the Python Interpreter preference page
and install packages from there. Right under selected Python interpreter is a list of installed
packages (so far just setuptools and pip). To install new packages click add "+" sign and search
for pytest package. Press install package to install it. This will be added only to our project’s
virtualenv.
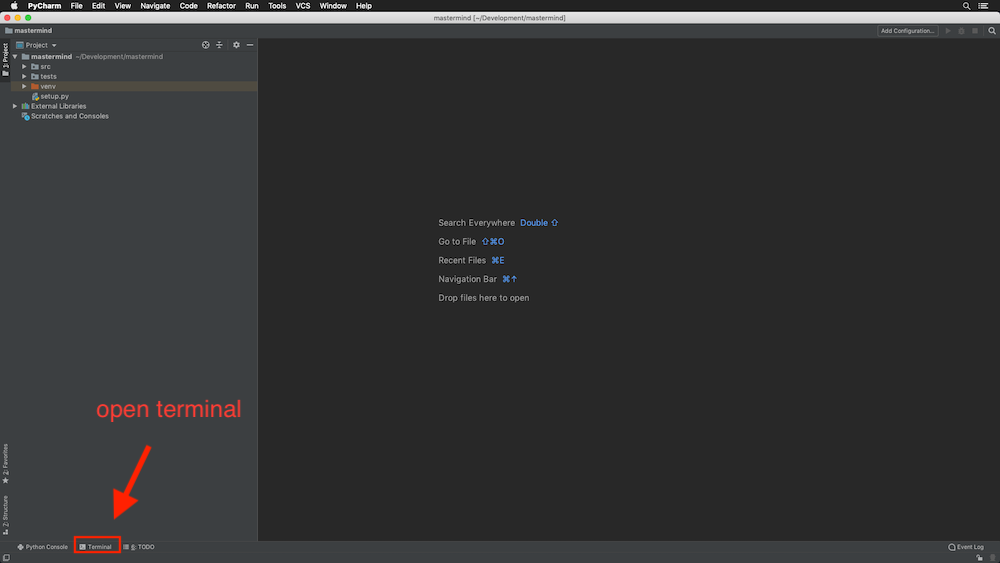
If you prefer console, you can install any Python packages using pip command. Just open the console by pressing terminal at the left - bottom.
Install pytest with command pip install pytest. This has the same effect as installing
with PyCharm interface. Using terminal you should see something like this:
(venv)$ pip install pytest
Collecting pytest
  Downloading https://files.pythonhosted.org/packages/5d/c3/54f607bc9817fd284073ac68e99123f86616f431f9d29a855474b7cf00eb/pytest-4.4.1-py2.py3-none-any.whl (223kB)
     |████████████████████████████████| 225kB 1.7MB/s

...[MORE PIP OUTPUT]...

Requirement already satisfied: setuptools in ./venv/lib/python3.7/site-packages (from pytest) (41.0.1)
Installing collected packages: pluggy, py, attrs, atomicwrites, more-itertools, six, pytest
Successfully installed atomicwrites-1.3.0 attrs-19.1.0 more-itertools-7.0.0 pluggy-0.9.0 py-1.8.0 pytest-4.4.1 six-1.12.0
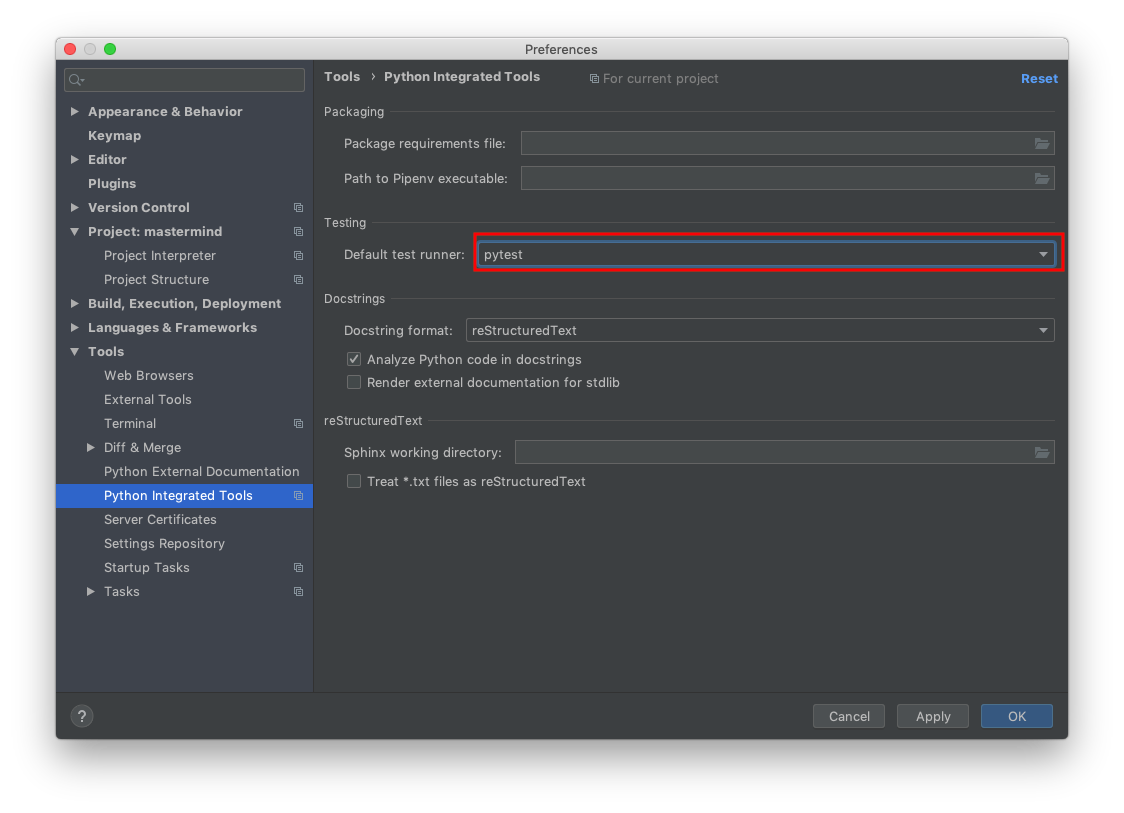
Now we can configure pytest as our default test runner in PyCharm. You can find this setting under
Preferences -> Tools -> Python Integrated Tools. Set Default test runner to pytest.
Running App / Tests
So far, we’ve been playing with PyCharm and configuration. Now we should try out the app,
if it’s working and if we can proceed further. MasterMind can be executed as a module.
In the terminal, we would need to execute this command to start the game. Please note,
that the current working directory must be in src directory.
(venv)$ cd src
(venv)$ python -m mastermind
When you execute just the module like that, Python will know to go to the __main__.py file,
which contains the main function and execute it.
So how to do this in PyCharm? We’ll need to create Run Configuration.
In this configuration, we’ll basically do the same thing, as in terminal. Just execute a module
called mastermind. Also, in the terminal, we’ve cd (change directory) to src, which contains
our mastermind module. We have to configure this in PyCharm as well. Otherwise, it would not
know where to find our module. You can do so, by right clicking on src directory and marking
it as sources root.
Now, it’s time to run our tests for MasterMind. To create a test configuration, we’ll use IDE
to set it up for us. Just right-click on tests directory in Project tool window
and select run pytest in tests.
This will do 2 things. It’ll run the tests and create run configuration. Test results are displayed in Test Runner Tab.
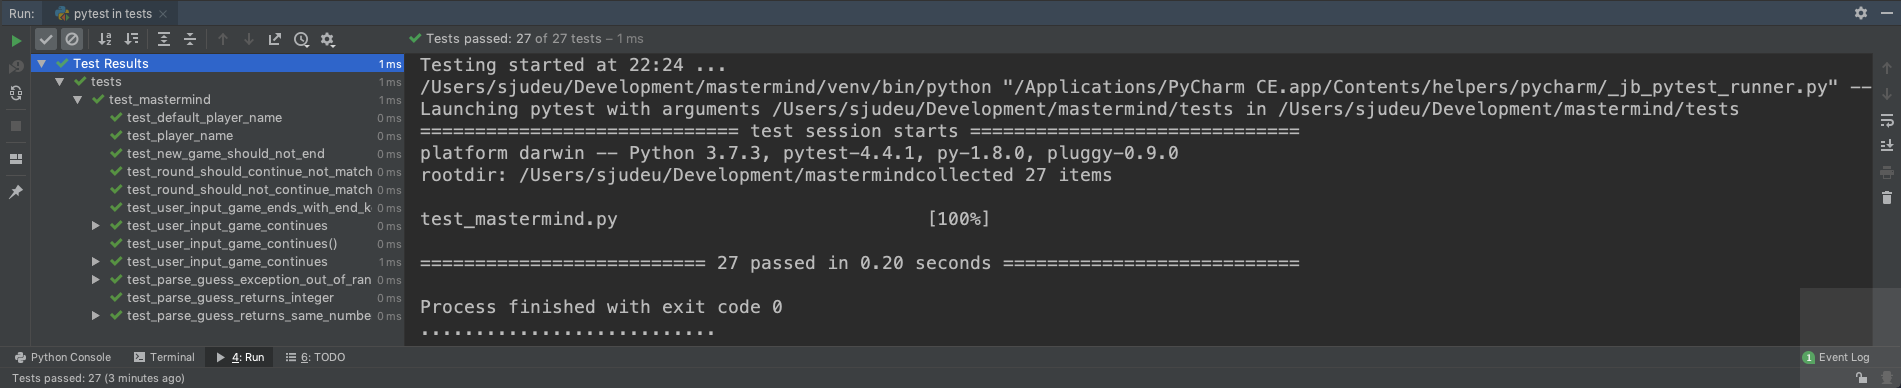
Also, note the test configuration in the top right corner. We can save this configuration as our default test run.
Useful features
There are a couple of features that are useful for everyday workflow.
Execute Single Test
When we’re writing new tests for our app, PyCharm makes it really easy to execute a single test. E.g. the one that you’ve just finished writing. You can do so by pressing the green play button, next to the test definition.

Of course, that’s not the end of it. PyCharm lets you execute a whole class (containing multiple tests) or a single file (test suite). You can select these options from the context menu of a mouse right click.
From the official documentation:
In many cases, you can initiate a testing session from a context menu. For this purpose, the Run and Debug commands are provided in certain context menus. For example, these commands are available for a test class, directory, or a package in the Project Tool Window. They are also available for a test class or method you are currently working on in the editor.
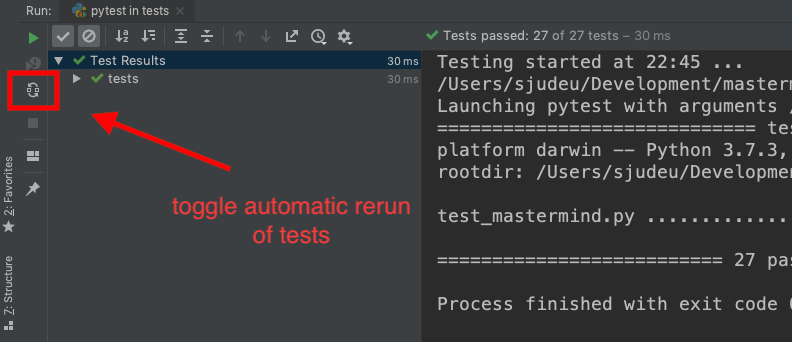
Auto Test Rerun
It’s better to focus on programming and don’t worry about the tests (until it’s too late) so let’s make PyCharm do the hard work for us. In the Test Runner Tab, we can toggle the automatic rerun of the tests on a code change. Pretty neat, right?
So for example, if we introduce an error, we’ll know it immediately. You’ve probably heard that fixing defects later is much more expensive than early. This will give us rapid feedback!
There are a couple of disadvantages IMHO. It’s great to have rapid feedback, however, PyCharm will trigger the tests on each file change. Even if you add a new line. Moreover, PyCharm auto-saves your changes, which leads to even more repeatedly executed tests.
You could set the automatic rerun of a subgroup of the tests (different run configuration). For example, if you are working on particular functionality, you can set a smaller test suite (covering only what’s needed) and set auto tests just for that configuration. However, you have to do this manually, and not to forget to change it back, when you’re finished. But as Raymond Hettinger always says: “There must be a better way”. And a better way there is. Let’s check out two very useful pytest plugins that will make your testing life easier and far more efficient.
Test only what’s changed – pytest-testmon
pytest-testmon is a pytest plug-in which automatically selects and re-executes only tests affected by recent changes.
Again you can install pytest-testmon either from PyCharm’s Python Interpreter preferences window
or from terminal using:
(venv)$ pip install pytest-testmon
Collecting pytest-testmon
  Using cached pytest_testmon-1.4.5-py3-none-any.whl (28 kB)
...
After successful installation create pytest.ini in the project’s root directory to instruct
pytest to always use testmon plugin and we are good to go:
[pytest]
addopts = --testmon

After code change, only tests affected by this change will be selected and executed. In this case running 1 test from 27, saving 26* unaffected from being run (*results may vary)
Randomize and discover hidden flaws – pytest-randomly
Another way to level-up your testing skill, is to use pytest-randomly. Randomness in testing can be quite powerful to discover hidden flaws in the tests themselves, as well as giving a little more coverage to your system.
(venv)$ pip install pytest-randomly
Collecting pytest-randomly
  Downloading pytest_randomly-3.12.0-py3-none-any.whl (8.5 kB)
...
After successful installation let’s update our pytest.ini to also use randomly with our testing
setup:
[pytest]
addopts = --testmon --randomly-seed=last
All affected tests will be shuffled each time they run, which can give us new insights into unwanted (test) dependencies.
Final thoughts
In this article, we’ve managed the integration of pytest framework in PyCharm. After setting up an automatic rerun of tests, with the help of two pytest plugins, pytest-testmon and pytest-randomly, we can focus on programming and get rapid feedback from our test cases.
Another nice feature is to execute tests that are being currently developed. We can write the tests and see if everything works as expected. Just with the press of a button, we can get the feedback.